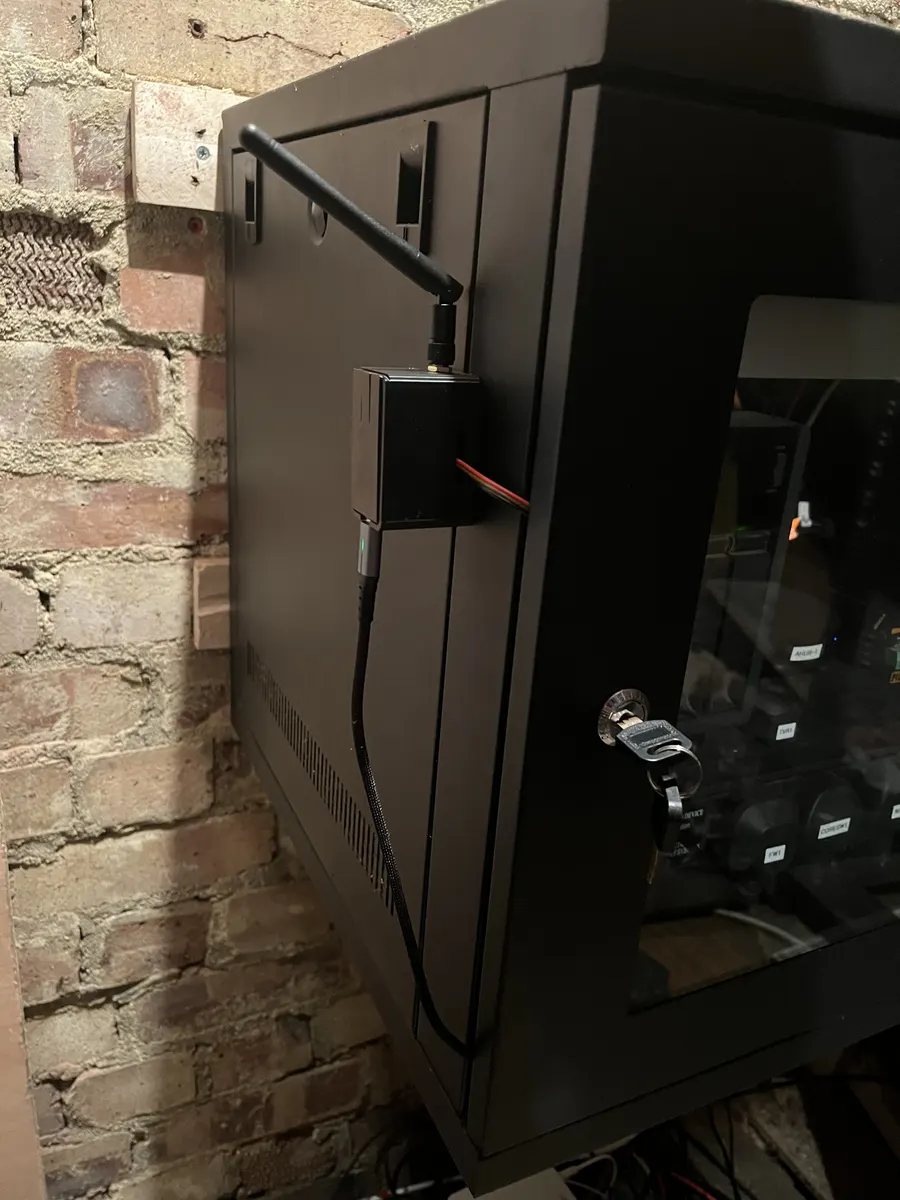
My comms rack has a temperature sensor inside it that tells Home Assistant when to switch the rack fans on and off. It used to be a battery powered Zigbee sensor, and it had two habits I got tired of. The batteries needed changing every so often, and if the Zigbee network had a wobble the sensor dropped off, which left the fans with no temperature to go on.
So I built my own: an ESP32 running ESPHome with an AM2302 temperature and humidity sensor. It’s powered by USB from inside the rack, so there are no batteries to change, and it talks to Home Assistant over Wi-Fi instead of Zigbee.
Kit List
Everything came from Amazon, and most of it comes in packs, so there’s plenty left over for the intake sensor and other projects:
- 1x ESP32 development board with the ESP32-WROOM-32U module and an external aerial (pack of 2): https://www.amazon.co.uk/dp/B0H7GSFVR1
- 1x AM2302 temperature and humidity sensor, the wired version of the DHT22 (pack of 2): https://www.amazon.co.uk/dp/B0CD6XQC1L
- 1x 8mm x 3mm magnets for the cases (pack of 50): https://www.amazon.co.uk/dp/B074C79DJS
- 1x USB A to USB C cable to power the ESP32 from the rack: https://www.amazon.co.uk/dp/B09P8KM9Z6
- 1x small white cable ties, 100mm x 2.5mm (pack of 100): https://www.amazon.co.uk/dp/B072SNJPJZ
- Filament for the two 3D printed cases
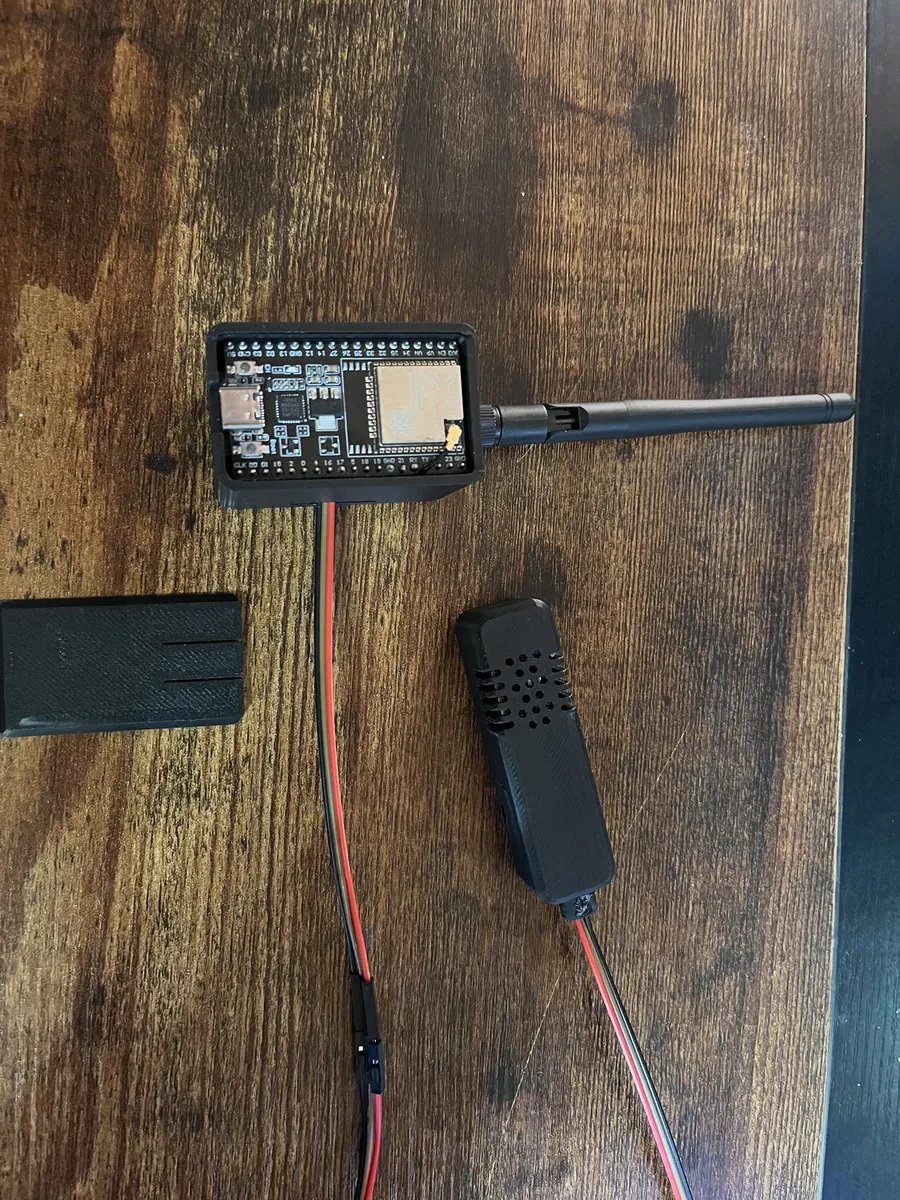
The AM2302 only has three wires: red to 3.3V, black to ground, and the data wire to GPIO4 on the ESP32.
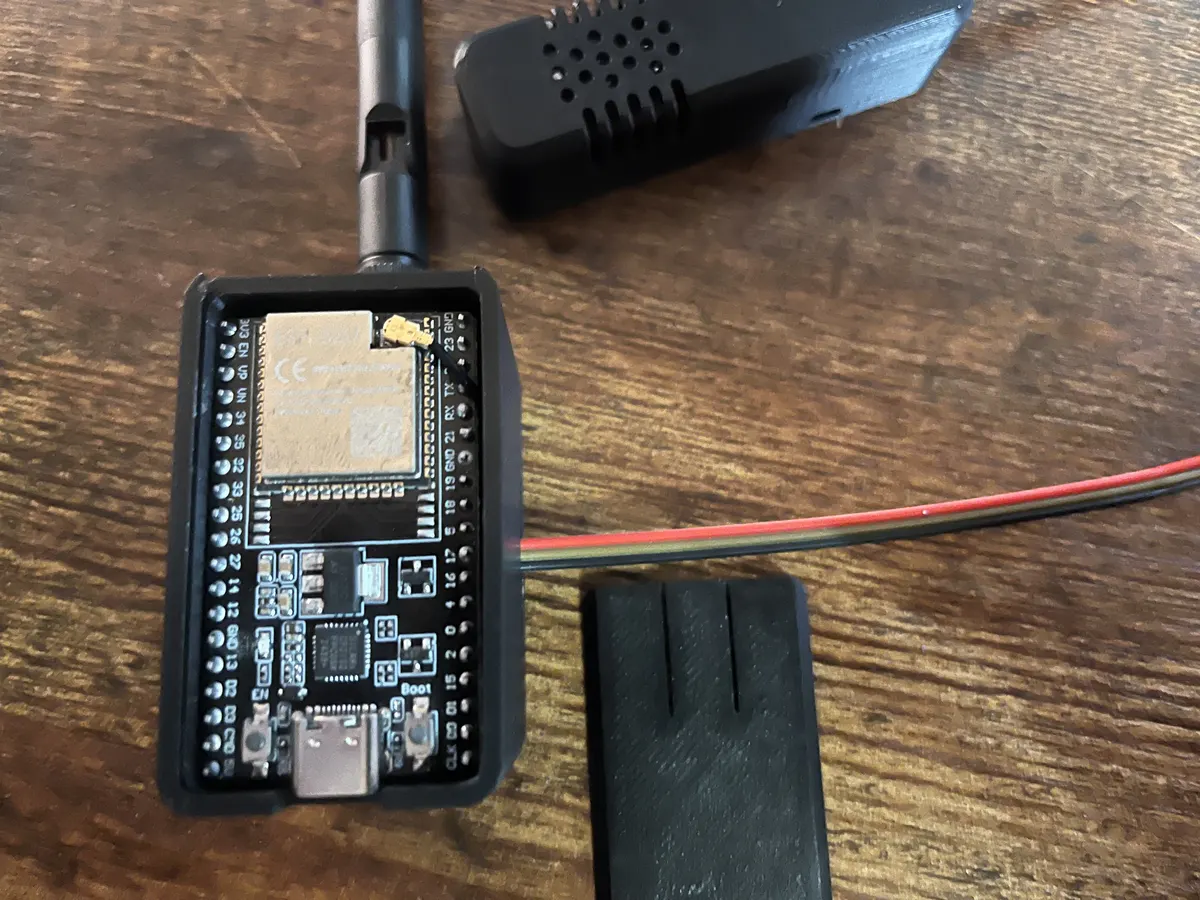
The 3D Printed Cases
I printed both cases on my Creality K1 SE, and both have magnets set into the back, so they stick straight onto the steel rack with no screws or sticky pads.
The ESP32 case is adapted from the ESP32 Case for WROOM-32U with external antenna by iamaustin, shared under a Creative Commons Attribution licence. I added the magnets and made some improvements to the lid. The AM2302 case, base and lid, is my own design.
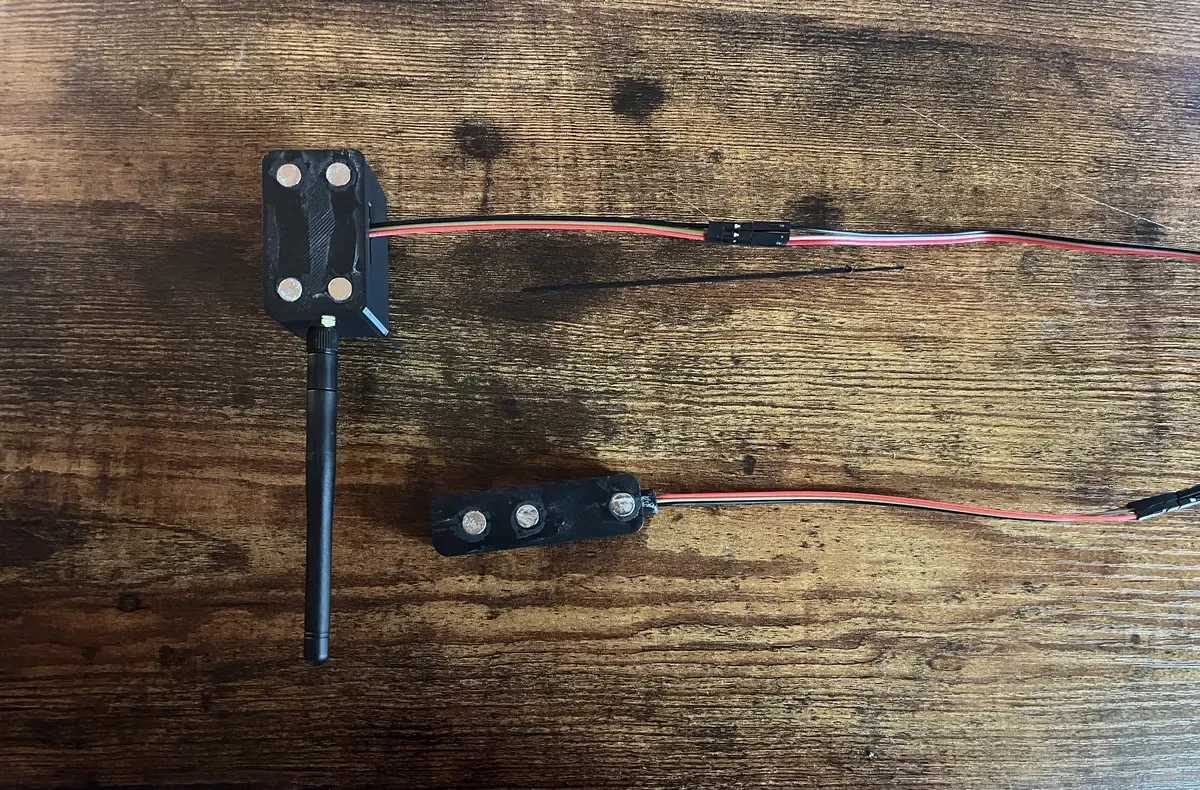
At the moment the ESP32 box sits on the outside of the rack with the sensor cable going in, and the power comes from USB inside the cabinet. Later on I might drill some holes so the cables can run through the rack properly, but first I want to see how well it stays online and reporting before I make it permanent.
3D View and Downloads
You can spin the cases round here. Pick a part, then drag it to rotate.
Drag to rotate, scroll or pinch to zoom, double click to reset.
If you’d like to print your own, the files are free to download:
- esp32-wroom-32u-case-magnetic.stl (135KB), my magnetic version of iamaustin’s ESP32 case. It’s still under the same Creative Commons Attribution licence, so credit iamaustin if you share it.
- am2302-case-base-magnetic-v1.1.stl (745KB) and am2302-case-lid-magnetic-v1.1.stl (1.2MB), the sensor case.
Check your board and magnets fit before you print, as ESP32 boards and magnet sizes vary.
The ESPHome Config
This is the part that reads the sensor. It takes a reading every 30 seconds and sends the temperature and humidity to Home Assistant:
esphome:
  name: rack-monitor
  friendly_name: Rack Monitor

esp32:
  variant: esp32
  framework:
    type: esp-idf

api:
  encryption:
    key: "<your-api-key>"

wifi:
  ssid: !secret wifi_ssid
  password: !secret wifi_password
  min_auth_mode: WPA2

sensor:
  # AM2302 / DHT22: red = 3V3, black = GND, data = GPIO4
  - platform: dht
    pin: GPIO4
    model: AM2302
    update_interval: 30s
    temperature:
      name: "Rack Temperature"
      accuracy_decimals: 1
    humidity:
      name: "Rack Humidity"
      accuracy_decimals: 0
The rest of the config is the same set I put on all my ESP devices, so they all look alike in Home Assistant: Wi-Fi signal in dB and as a percentage, last boot time, IP and MAC address, an online status sensor, a restart button and the ESPHome web page. It’s also part of my nightly ESPHome firmware updates, so I never have to update it by hand.
What It Does in Home Assistant
The new sensor drives the same fan automation as before: the rack fans come on above 21°C and go off below 19°C, and Home Assistant checks the temperature again after a restart. I’ve written that automation up in full in keeping my comms rack cool. The only change was pointing it at the new sensor.
Final Thoughts
It’s a small build: an ESP32, an AM2302, a USB cable, some filament and a few magnets. It means one less sensor with batteries to change and one less device relying on Zigbee for the rack fans. If it keeps reporting reliably, I’ll drill those cable holes and make it a permanent part of the rack.
I’m also planning to add a second sensor on the rack’s air intake soon.
What to read next
3 pages
Related reading
1 page
This is part of my smart home: see how it all fits together. Got a question about this, or built something similar? Get in touch. New write-ups go out on the RSS feed and LinkedIn, everything I've built is on the projects page, and my free calculators and guides are on the tools page.